Just like Millie’s – white chocolate chip cookies recipe

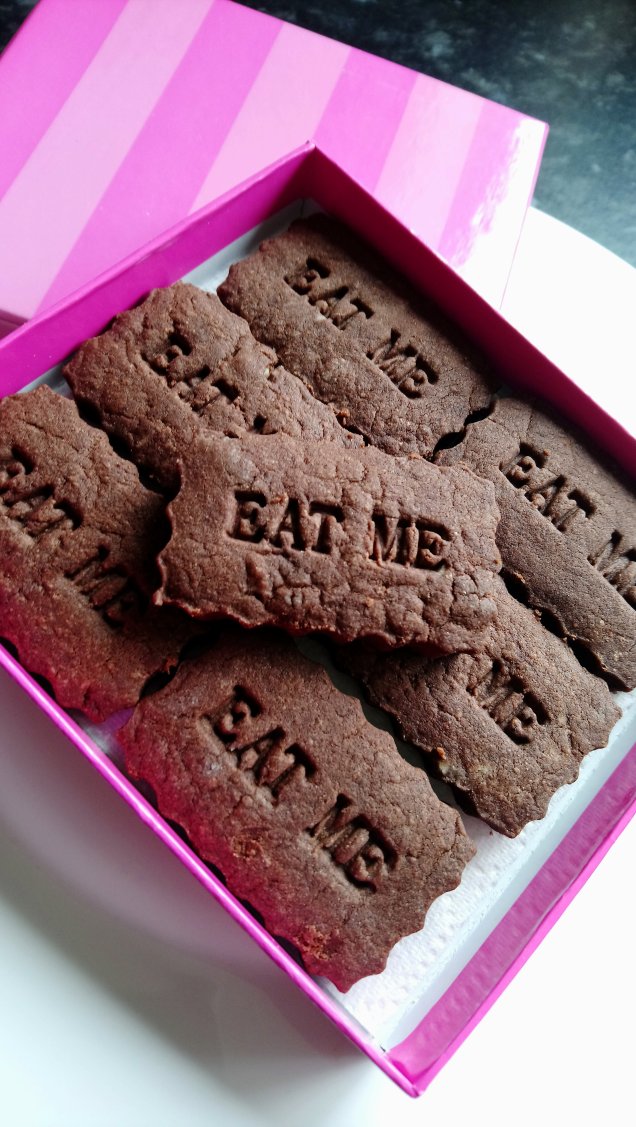
I love stopping off at a Millie’s cookie stall whenever I go past one but unfortunately I don’t live close to one.. Therfore I have been practicing my cookies to try and make lovely soft cookies.

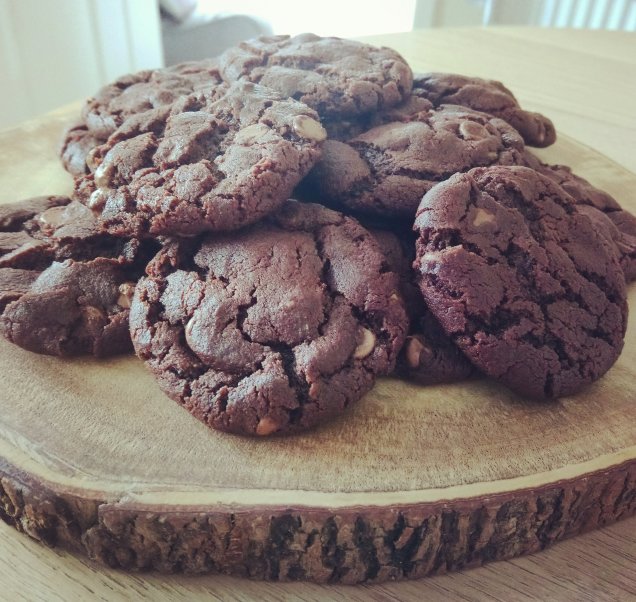
I think I have already created a good double chocolate chip one and the recipe is on the blog here – Double chocolate chip cookies recipe but now I have the white version to go with it.

Hopefully, as soon as my new niece or nephew is born then my sisters gestational diabetes will be gone and I can treat her by making a huge box of these. I might also include some fruit in them, raspberries would be perfect.

In the mean time, this is a very quick and simple recipe to make and even though my son is older, at 13 weeks he’s still not ready to nap so that mommy can bake too much. I need recipes that are easy, allow me to satisfy my baking needs and aldi do it all whilst entertaining a little man.


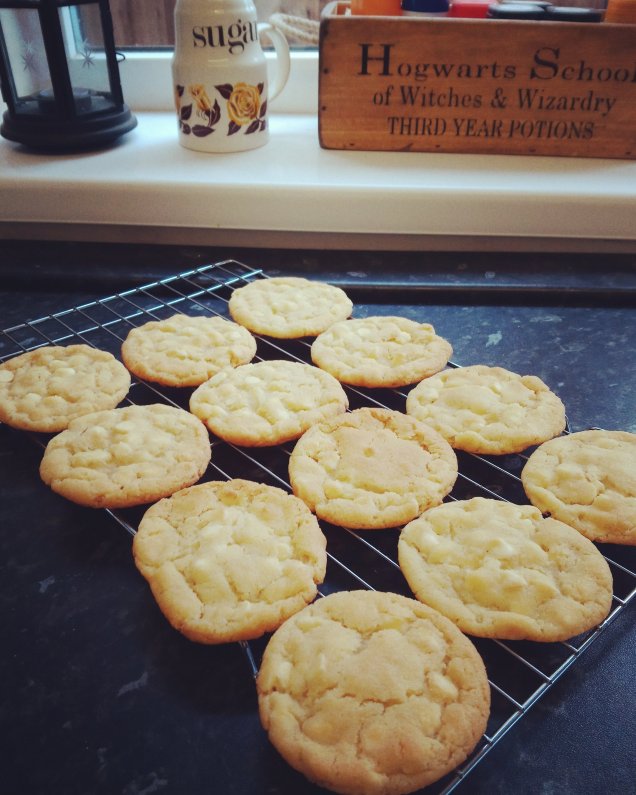
White chocolate chip cookies

Ingredients

  • 100g white sugar
  • 100g butter
  • 1 teaspoon vanilla essence
  • 1 tablespoon golden syrup
  • 120g self raising flour
  • 30g all purpose plain flour
  • 100g chocolate chips

Method

Pre heat the oven to 180c

In a bowl cream the butter, sugar and vanilla together then mix in the golden syrup.

Add in the flours and mix it till it comes together. You can do it with a spoon but feel free to use your hands.

Once combined then add in the chocolate chips and mix them in. Try not to overwork the mixture, stop as soon as the chocolate looks evenly distributed.

Using a teaspoon measure out and roll into balls the size of cookies you’d like. I made 12 decent sized cookies. You don’t need to flatten them down, just put them on the tray in balls.

Bake in the oven for 12-14 minutes if you’ve made 12. Go for 12 minutes but if they haven’t settled too much then add another 2 minutes but no longer.

When they come out of the oven let them cool first otherwise you’ll just break them.

For a variation, add in a handful of raspberries after you’ve mixed in the chocolate chips.

Little tip – put the tablespoon in boiling water before using it to get out the golden syrup as then it’ll just slide off

Diabetic chocolate shortbread – baking without sugar

My sister is currently pregnant but despite her healthy life (including running a half marathon just before getting pregnant) she has gestational diabetes.

Unfortunately, she has a sweet tooth just like I do and the lack of chocolate, cakes and biscuits has been really hard for her so I’ve started looking up recipes that she may be able to eat.

One I thought that would be extremely simple to do would be to make shortbread and swap the sugar for sweetener. Now I don’t advocate sweetener being any ‘better’ or healthier for you than sugar but it’s a way to enjoy a little treat when you can’t have sugar.

I can’t say this recipe will be good for everyone with diabetes as you’ll know your diet better than anyone but it has certainly worked for my sister.

I decided to make the recipe chocolate flavoured by using cocoa powder as this doesn’t actually contain any sugar. If you’ve ever been curious and tried cocoa powder you’ll realise it’s extremely bitter on its own. Remember – cocoa powder, not drinking chocolate. There’s a big difference between the two. Unless you can have sugar, don’t use drinking chocolate for this recipe!

To also try and take a little of the bitterness away I wanted to flavour the chocolate so used orange blossom water (Nielsen Massey Orange Blossom Water is the exact brand) and I checked out the ingredients to make sure it didn’t include sugar.

The end result was a little box of biscuits, which although may not taste as sweet as you’d expect, they’re a nice biscuit treat when you can’t have sugar.

No sugar chocolate orange shortbread

This made 7 cookies. Recipe easily doubles

Ingredients

  • 1.5 tablespoons Canderel (I used this as it’s the one I had but try other types of sweetener) If you wanted to make this recipe with normal sugar it would be 1.5 tablespoons granulated sugar which equals 1oz.
  • 2oz butter
  • 3oz plain all purpose flour
  • 1 tablespoon cocoa powder
  • 1. 5 teaspoon orange blosson water (you can flavour with anything you like but check to make sure it doesn’t contain sugar in the ingredients) It might be even better if you finely grate the zest of an orange though I haven’t tried it yet

Method

Preheat the oven to 180c

Make sure your butter is at room temperature or soften in the microwave before using

In a bowl mix the Canderel, butter, flour, cocoa powder and orange blossom water. Basically all of the ingredients.

Mix till they just combine, you don’t want to over work the dough as this will make it tough.

Use your hands to bring the last part of the dough together and on a lightly floured surface roll out to about the thickness of a £1 or euro. I’m afraid I don’t know the American coin equivalent, but you don’t want these too thick or thin.

Cut out using your cookie cutter of choice and continue till all the dough has been made into biscuits. Try and get as many shapes cut out each time as the less times you re-roll the better.

Line on a tray with non stick lining on and chill in the fridge for 30 mins-ish. It’s not imperative you do this, it just helps the cookies keep their shape whilst baking.

Bake in the middle of the oven for 12 minutes.

The biscuits will seem soft when they first come out so don’t try and remove them immediately. Let them cool for 10 minutes then you’ll be able to move them onto a wire rack to cool.

There you have it! A rediculously easy shortbread recipe, sugar free.

Enjoy…just don’t eat too many too quick.

What a good idea! Hot cookie dough

I know it’s been a little while since I updated but I have had quite a good reason. I’m now a mum to two beautiful children as my son was born on the 14th June. For the moment any spare moment I’ve had has been spent sleeping, eating or other millions of little jobs in the house that always need doing like washing up or folding clothes. I will definitely continue to bake and to blog about my recipes but for a little while they will be infrequent. Thank you to everyone who has so far supported my fledgling blog xx

*****

In the UK we don’t really have a love of cookie dough but we should as its great and today on a lunch out with my best friend I had hot cookie dough!

It was just…. wow.

Now all it really is, is cookies straight out of the oven when they are still warm and haven’t had time to set yet. You cook each one in an individual little tray or ramekin, because it would be rather messy to try and scoop one off baking parchment.

Then all you need is a scoop or two of good ice cream, maybe a little drizzle of hot melted chocolate and add some extra chunks of chocolate on top and voila… You have an amazing, quick and simple dessert.

How about trying any of the fantastic cookie recipes on this blog, making sure you time it right so as to not over cook them? So, I may be a little behind in finding these out but at least I get there in the end. I think I know what quick desserts we’ll be having at home.

This was the dessert which made me think (and made me very happy eating it) It was from the Little Dessert shop in Stafford, Staffordshire, England.

Easiest Nutella chocolate chip Cookies

This morning I’d had my breakfast but my stomach started rumbling. My other half asked if I was hungry and I said I was, so I might get a piece of bread with Nutella on it.

He laughed and said I’m obsessed with Nutella… I think I am!

Every year we go to Italy and I always bring back a Nutella in a glass so I can keep the glass afterwards. I love the designs, we don’t really have any patterns or cartoon characters on our Nutella glasses in the UK so it’s quite nice seeing what they have each time.

Instead of having my bread I decided to make a very quick cookie recipe instead. It’s so easy and only really needs three ingredients but I decided to add some nuts and chocolate chips which makes five.

These are so easy that I have managed to do them whilst my 12 day old newborn sleeps.


Easiest Nutella chocolate chip cookies

Ingredients

  • 60g plain flour
  • 130g Nutella
  • One medium egg
  • 50g dark chocolate chips
  • Handful of sliced almonds (or any other nuts)

Method

Preheat the oven to 180c

In a bowl mix the Nutella, flour and egg.

When combined mix in the chocolate chips and nuts.

Using a teaspoon to measure little balls of dough rolled quickly with your hands.

Bake in the oven for 10 mins

That’s it! So quick and simple.

Baking Italian cookies from my favourite cookbook

I’m guessing that if you like baking then you also have a favourite cookbook?

Yes!

Mine is Sweet Maria’s Italian Cookie Tray and I have had it for about 12 years now.

I have made so many recipes from the book and some I just make over and over again. I love everything I make from there and the thing I was so happy about is how you can taste Italy with everything you make.

Its not like someone has tried to make an Italian recipe, these are genuine family recipes that work and that’s what I try and achieve in my baking.

Unfortunately my Italian great auntie Aida passed away before I got to write down any of her recipes. I feel such a fool now thinking of how many of her amazing recipes and creations I loved to eat but didn’t ever ask her to teach me so I could preserve the legacy.

I try and bake and cook Italian food a lot but I know I’ll never be as good as she was.

Luckily this book means I am able to bake Italian cookies, or biscotti, that taste like what I can buy over in Italy and that makes me very happy indeed.

This time I made cinnamon and nutmeg cookies and chocolate almond macaroons.

I won’t post the recipes directly from the book but have a look at the shop and if you want to treat yourself to a good Italian cookbook then this is the one.

https://www.sweet-marias.com

Vegan cupcakes – because not everyone can eat everything

I’m not vegan, or vegetarian or have anything that I’m allergic to and I am very lucky that I don’t have to worry about anything (except the calorie count) that I eat.
Not everyone I know is so lucky.

My friends little girl is allergic to dairy and eggs so I started to have a look at vegan recipes since I thought these will accommodate her requirements.

I searched the Internet and luckily at the moment vegan recipes are extremely popular and the ingredients are easy to buy so I decided to start with something simple – a cupcake

It is also handy that the company that I buy my flavoured icing sugar from is all natural ingredients and also gluten free and vegan! Bonus. This meant I could actually decorate with an icing without the worry of making someone ill.

The recipe came out OK, quite bready but also sweet and cupcakes like. I didn’t make any tweaks to the recipe at all because I didn’t want to include an ingredient I shouldn’t have but if you know what you’re doing then feel free to experiment with the flavours as it’s a good base.


Vegan (dairy free) vanilla fairy cakes

This is the recipe that I used from the Tesco website:

Dairy and Egg free vanilla cupcakes

Ingredients

  • 100g (3 1/2oz) self-raising flour
  • 50g (2oz) caster sugar
  • ½ teaspoon baking powder
  • 100ml (3 1/2fl oz) soya milk
  • 2 tablespoons sunflower oil
  • 1/2 teaspoon lemon juice
  • 1 1/2 teaspoon vanilla extract

Method

Preheat the oven to gas 4, 180°C, fan 160°C.
Place cupcake cases into the hollows of a 12-cup bun tin. Measure out the flour, sugar and baking powder into a bowl.
In a separate bowl, measure out the soya milk and the oil, then stir in the lemon juice and vanilla extract. Tip the soya milk mix into the dry ingredients and whisk quickly until everything is combined. Quickly distribute the mixture evenly across the cake cases. Bake for 25 minutes until slightly browned. (An inserted skewer should come out clean.)

Cool on a wire rack.

Icing

For the finished item I made a simple water icing using apple crumble icing from Sugar and Crumbs.

I definitely recommend their products, not just for flavour but because anyone can eat them. I don’t get paid to say that! It’s just my own recommendation as they are fantastic, I’ve been using them for a few years now.

Sugar and Crumbs

At the moment I haven’t had chance to practice any more vegan recipes but it’s definitely something I’d like to do more of.

Birthday Cakes: The ‘easy to do because I’m not actually very good at cake decorating series’ – Unicorn Cake

I’m not very good at cake decorating and I’m not just saying that in a way to make people go “oh but you are!” whilst I feign surprise. It’s just the way it is.

I can though make a passable birthday cake that looks OK. It’s not going to win any awards and I won’t charge people for my cakes, I make them as gifts or favours instead as then the pressure is less.

However, I know my cakes at least taste very good so the decorating can be done fairly easily with a few basic tools and often with plastic figurines as I absolutely cannot mould figures… Trust me, they look terrifying!

I do have very basic skills for cake decorating:

  1. I can fondant ice a cake very quickly and smoothly
  2. I can do basic curly writing
  3. I have quite a collection of nozzles and I can pipe the basics for buttercream
  4. I have a large selection of gel colours for icing, including ones you can paint with or put in a spray gun

These basics do come in very handy and you will need to have at least fondant iced a cake before and piped buttercream.

My final secret weapon (besides the plastic figurines) is that I do a lot of research first and know my limitations. Don’t be afraid to say “that’s a nice idea, but way out of my skills league”.

This cake I was quite lucky with as it was what my niece decided she wanted – a unicorn cake.

I have seen millions of these on the Internet so I knew this would be in my capability


The unicorn birthday cake

First you need a tall round cake. This one I made with 3 layers in a 9″ cake tin. The cake was filled with Nutella as my niece doesn’t like jam but you can do whatever cake you like. I’ll put up the recipe for an easy birthday cake soon.

First you need to ice the cake in white fondant.

Next you need to decide what eyes you would like to ‘paint’ onto the cake. I always have a couple of good paintbrushes that I keep just for cake decorating.

For this, I mixed up a bit of gold powder with a tiny bit of vodka. Don’t worry, it’s very tiny amount but the alcohol evaporates and is easy to work with.

Paint your eyes onto the unicorn cake. I just did these nice and easy ones. They weren’t perfect but you can keep adding a little to make them look better.

Next it’s time to make some ears and a horn. For this you’ll need cocktail sticks or plastic lolly sticks (the round ones) and some flower or modelling paste.

The ears are very simple as they are just triangles and to make the horn I rolled out a piece of modeling paste and wrapped it round a plastic lolly stick.

I painted them in the same gold paint and waited for them to harden before using them on the cake. If you use normal fondant then they might get warm and droopy.

When they are set, leave some stick to be able to poke them into the cake.

Finally it’s starting to look less scary!

Mix up the colours of your choice into buttercream or royal icing, I used buttercream, and (if you can) use disposable piping bags with 3 different types of nozzles. I used a large spiky one, a large one to make roses and a smaller rose one. I can find the exact numbers for anyone who wants to know but you don’t have to be too precise.

Then, starting at the front and working back pipe a mixture of swirls, flowers, star shapes or stripes. As long as you mix up the colours nicely so you have a good selection you can be as bright or as pastel as you like! Have fun with this part as it really makes it come together. Add some sprinkles if you like and some edible glitter.

In the end you should get quite a pretty cake which people will be impressed with (as long as they aren’t a professional cake decorator)

My niece Magda was happy with it, and so was I. It was the least fussiest cake… that even I could do.

Mega yummy double chocolate chip cookies

I used to always make cupcakes when I wanted to bake something quick and easy but I hate making buttercream so recently I have made them less and less.

Instead I love to bake loafs and cookies as then I don’t have to make the dreaded buttercream.

Cookies have to be squidgy though, I’m not a fan of a crunchy one unless it’s an Italian biscotti so this recipe is perfectly squidgy and rediculously easy to make. Go forth and bake cookies!


Squidgy and easy to make double chocolate chip cookies

Ingredients

  • 100g sugar, brown or white is fine
  • 100g butter or margarine
  • 1 tablespoon golden syrup
  • 110g self raising flour
  • 40g cocoa powder
  • 100g chocolate chips

Method

Pre heat the oven to 180c

In a bowl cream the butter and sugar together then mix in the golden syrup

Add in the flour and cocoa powder and mix it till it comes together. You can do it with a spoon but feel free to use your hands.

Once combined then add in the chocolate chips and mix them in

Using a teaspoon measure out and roll into balls the size of cookies you’d like. You don’t need to flatten them down, just put them on the tray in balls

Bake in the oven for 10-12 minutes. Go for 10 minutes but if they haven’t settled too much then add another 2 minutes but no longer

When they come out of the oven let them cool first otherwise you’ll just break them

Little tip – put the tablespoon in boiling water before using it to get out the golden syrup as then it’ll just slide off

Cherry scones – because I can’t always go out for afternoon tea

I love going out for afternoon tea, it’s one of my favourite pastimes (I’ll write about some of my favourite ones) but alas it’s expensive.

It doesn’t stop me wanting one though!

Although it’s easy to buy or make cupcakes and Victoria sponge you need your scones freshly made.

Therefore I decided I wanted cherry scones… And had to make some.

The only thing I don’t like about scones is the baking soda in them as it means I can only eat one before they make my teeth feel fluffy, but this recipe doesn’t use any and you can eat as many as your stomach can handle.

These are definitely best eaten warm, but if not all straight away then the second day is good too. You can just butter them but to really enjoy them then good jam and clotted cream is best. I didn’t have any clotted but I did make whipped cream.


Yummy warm cherry scones

The original recipe I used came from the Good Food website (link below), however I did swap the raisins for glacé cherries so I have altered the recipe to be what I did.

BBC Good Food fruit scones

For the inside filling I used a tub of extra thick double cream mixed with a little vanilla extract and a good strawberry jam.

Perfect!

Ingredients

350g self-raising flour, plus more for dusting
¼ tsp salt
1 tsp baking powder
85g butter, cut into cubes
3 tbsp caster sugar
175ml milk

+ a little to glaze

Glacé cherries – I think I probably used about 6 cut into little bits

1 tsp vanilla extract

Method

  1. Heat oven to 220C/200C fan/gas 7. Tip the flour into a large bowl with the salt and baking powder, then mix. Add the butter, then rub in with your fingers until the mix looks like fine crumbs. Stir in the sugar.

    sugar.

  2. Make a well in the dry mix, then add the liquid (milk and vanilla) and cherries and combine it quickly – it will seem pretty wet at first. Scatter some flour onto the work surface and tip the dough out. Flour the dough and your hands, then fold the dough over 2-3 times until it’s a little smoother. Pat into a round shape about 4cm deep.

  3. Take a 5cm cutter (smooth-edged cutters tend to cut more cleanly, giving a better rise) and dip it into some flour. Plunge into the dough, then repeat until you have four scones. You may need to press what’s left of the dough back into a round to cut out another four. I always make a little odd shaped one with what’s left of the dough – you don’t want to waste any!

    I always make a little odd shaped one with what’s left of the dough – you don’t want to waste any!

  4. Brush the tops with milk being careful not to get it down the sides, then put into the oven.

    put into the oven.

  5. Bake for 10 mins until risen and golden on the top.

    .

    Finally serve with your choice of tasty insides.

  1. .

    Finally serve with your choice of tasty insides.

Let’s start with cinnamon roll loaf

My daughter always asks me why I don’t make pizza on Friday like her granddad does and unfortunately my answer is because I don’t have time when I’m back from work.

I love making bread and bread based things, there’s something so satisfying about doing it all by hand and the smell when they’re baking is just wonderful.

But with a full time job and a 5 (and a half) year old I don’t get much chance to do it, so with my first full day off – let’s make bread!

I was initially going to make bagles but I’ve decided to leave these till tomorrow or Friday morning so we can have fresh ones when my daughter is home… Now we have cinnamon rolls instead.

Well, to be honest they expanded much more than I thought they would so instead of eating them as an individual roll, you cut a slice as they formed a nice loaf.

I kneaded these by hand, which was a really bad idea as I don’t seem to have enough energy to do that and the cramp wasn’t fun. Next time I’ll just get out the Kenwood mixer with the dough hook. They did get about 15 minutes kneading but I don’t know if this was enough so I’ll have to let you know when I’ve eaten all of it some.

I only made a small batch as everyone is on their summer diets so this recipe just made 6 roles instead of 12.


Yummy squidgy cinnamon rolls (loaf)

IMG_20180530_184606_045.jpg

Makes 6 or one loaf

  • 7g dried active baking yeast
  • 7 tablespoon light brown sugar
  • 1 teaspoon salt
  • 220ml warm water (should just feel warm on your skin)
  • 400g strong plain white flour
  • 1 egg
  • 2 1/2 tablespoons vegetable oil
  • 4 tablespoons caster sugar mixed with ground cinnamon (or use sweet cinnamon, like I did which is already combined with sugar)

Method

Mix up the water, sugar and yeast in a bowl and leave it for a few minutes till it starts to look frothy.

In another bowl add the salt, flour, egg and oil. You can make a little well in the middle but if you’re doing the initial mixing in a bowl you don’t need to worry about it running off the kitchen counter.

Mix the water and yeast mix into the other bowl with the flour. You’ll need to stir till you have no lumps left and it’s starting to look like dough.

Now comes the hard work. On a floured surface knead your dough. It will be sticky and hard to work with but keep going (till your arms hurt and then some more) and it will start to stick to itself and not everything around it.

When it’s been kneaded for at least 10-15 minutes then put it in a bowl that’s been lightly oiled and cover with clingfilm or a tea towel.

Now you can rest and have a cuppa tea as you’ll need to just wait about an hour for it to rise.

After its risen and looks much bigger then take it out, give it a quick knead and divide into 6 pieces.

Roll each piece into a rectangle and spread over the cinnamon sugar mix to each bit then roll it from one end to the other.

Put all 6 little rolls into a non stick or oiled tray, close together but not touching and cover them again to let them rise. This will be 40 mins – hour depending on how warm your kitchen is.

For me I put them too close and they merged and made a very interesting swirl bread.

Pre heat the oven to 180c and bake for approx. 30 mins.

Cool on a rack

You can add whatever topping you like but I went with the classic cream cheese

Cream cheese mixed with icing sugar and a splash of milk. Otherwise you could have this with custard or just icing sugar and water.

I gave it a dusting of cinnamon, as you can never have too much and ta-dah all done.

It won’t last too long as it’s home made bread and also rediculously tasty but keep it in a sealed container.